Recording Audio for AP Language Exams
Using a Mac and Garage Band.
This tutorial is specifically for recording AP Language Exams. A more general and complete tutorial is
Here
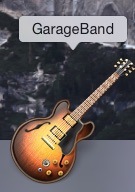
Locate the GarageBand icon on the Dock.
Double-click the icon to start the GarageBand Application.
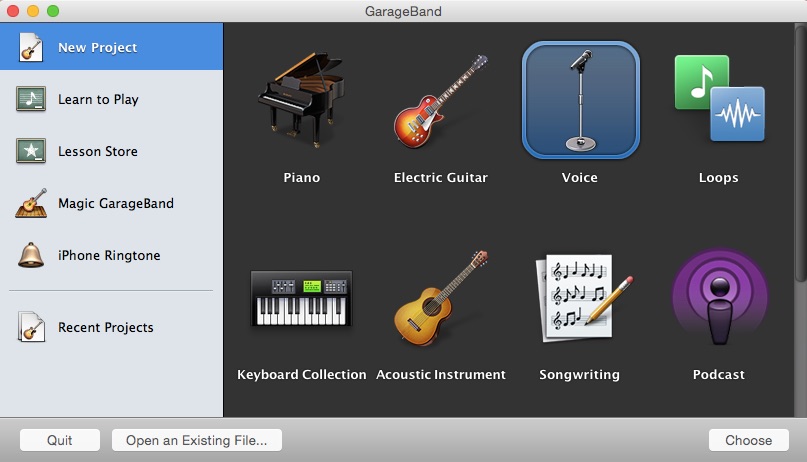
Create a new project.
This panel should appear. If it doesn't, choose "New" from the file menu.
Make sure you select "Voice" (with the Microphone and Stand icon) in the panel on the right.
Click "Choose" to continue.
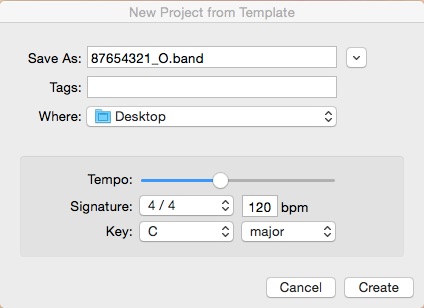
Fill in the Name of the Project.
The entire student response (spoken AP number and both spoken responses) for each
student will eventually be saved as a single file in the MP3 format and named as the student's AP
number, an underscore, the form, and the file extension .mp3. NOTE however that at this point the
file extension needs to be ".band" so that the GarageBand application can work with the file. When
we convert the file to "mp3" format during the export step later the extension will be changed by
GarageBand and the file will then have the correct name (e.g., 87654321_O.mp3).
The items for "Tempo", "beats per minute", "Signature"
and "Key" are meaningless for non-musical recordings. Ignore them.
Click "Create".
The Project Panel.
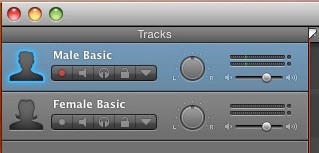
Two areas of the Project Panel are important. On the upper left you will see Voice Icons for "Male Basic" and
"Female Basic". These contain the record volume control and audio input indicator.
For our purposes the "Male" and "Female" are identical except for some obscure equalization details, so click one.
(Note: for musical recordings the difference between Male and Female tracks can be very important,
but for voice recordiings it is pretty much irrelevant. Choose your favorite.)
The other important area is the group at the bottom containing
one circular and five rectangular butons. These control stopping and starting recording and
the movement of the time cursor.
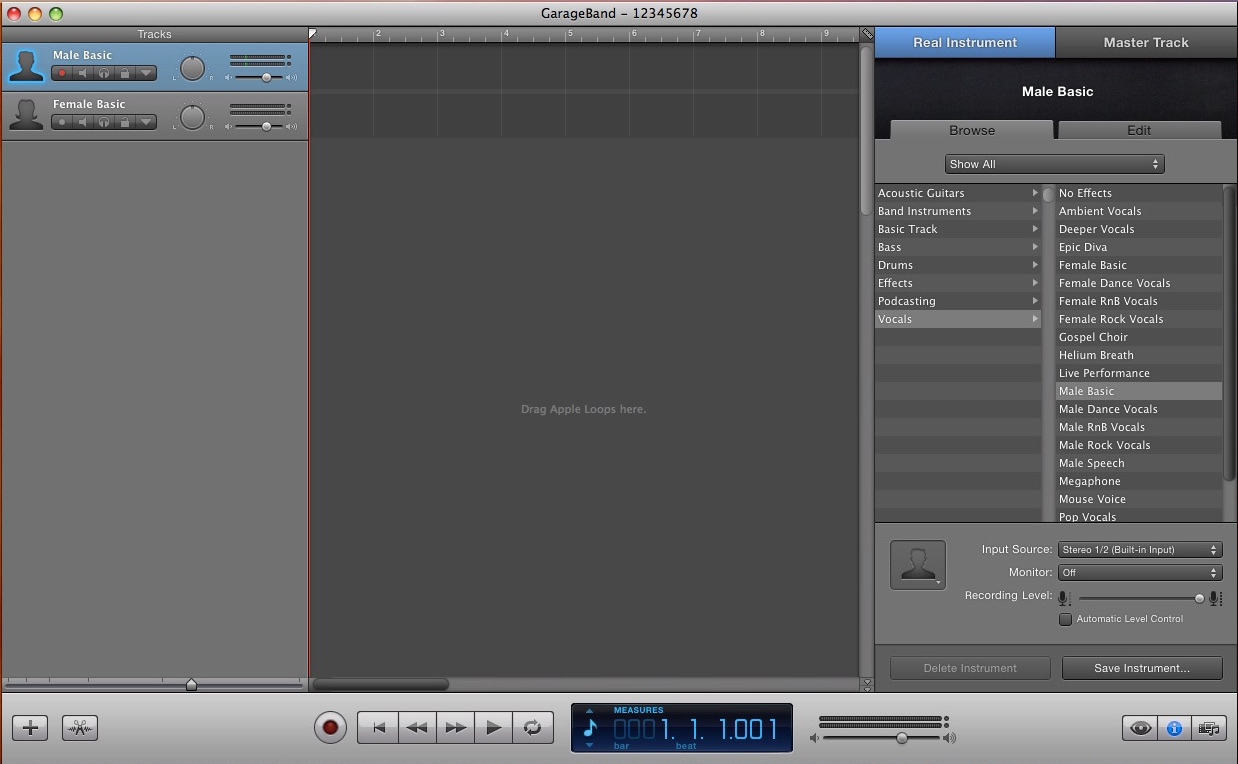
The Male and Female Tracks.
As noted above, choose the Male or Female track to work with. The important issue is to make sure that when you
talk you can see the dual (left and right stereo) audio level indicators move. The microphone volume control
is the horizontal slider below the level indicators. You will probably need to set the volume to the highest
(rightmost) position.
The leftmost button under "Male Basic" or "Female Basic" will show red for the track(s) that will be recorded.
Make sure only one is clicked and that when you talk you can see the green level indicators move for the track
you have selected.
Track Control Buttons
These buttons are located at the bottom of the project panel, slightly to the left of center.
These can be used to start and stop recording and listening. To begin recording press the round red button
on the far left of the group. To stop recording press the rightward facing rectangular button second from
the right. To resume recording again press the round red record button.

The reason for using different buttons to stop and record is that this is a MUSIC application, and
when a singer stops recording the beat goes on - creating a silent gap in that track.
That's what happens when you press the round red button to
stop recording. If, unlike a singer, you are just making an audio
speech recording you don't want gaps in the recording, so you do a "hard stop" with the right arrow button.
You can listen to your recording by stopping the recording and manually sliding the time bar at the top of
the project panel to where you would like to begin listening, then pressing the right arrow. When you
want to resume recording where you left off, use the right arrow to stop playback, then slide the time
bar in the project panel to where you want to start. Anything you record over will be erased.
Beginning Export of the Recording.
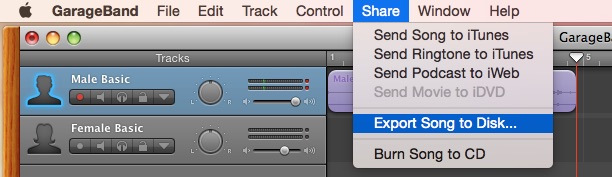
When you have completed the entire recording, go to the Menu bar at the top of the screen and select
Share/Export Song to Disk... as shown. When you do this, you will see the Quality and Coding panel below.
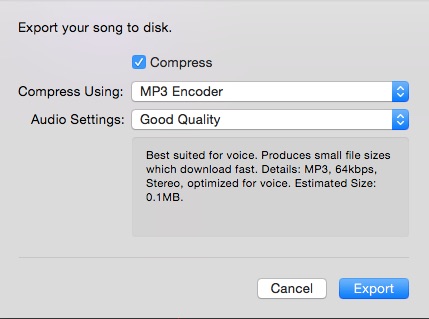
Setting Export Quality and Coding.
Make sure the "Compress" checkbox is clicked, that you are using the "MP3 Encoder" and have set "Audio Settings" to
"Good Quality" which is the lowest setting. This encodes at 64 kb/s, which is what most podcasts use. When
you have done this, press the "Export" button.
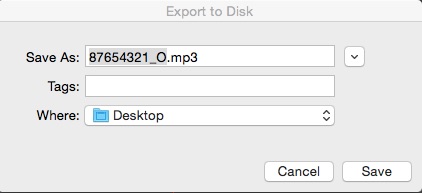
Completing Export of the audio file to the Desktop.
Be sure the name of the file is your AP number followed by an underscore, followed by the form designation, then ".mp3", which is the only encoding that the AP
organization will accept. Be sure to save to the "Desktop" as shown.
This completes the Process.
Make sure you can see the saved file with the ".mp3" extension on the desktop.
Quit GarageBand.
Your test administrator will make sure your recording file is submitted to AP in the proper manner.
Ω